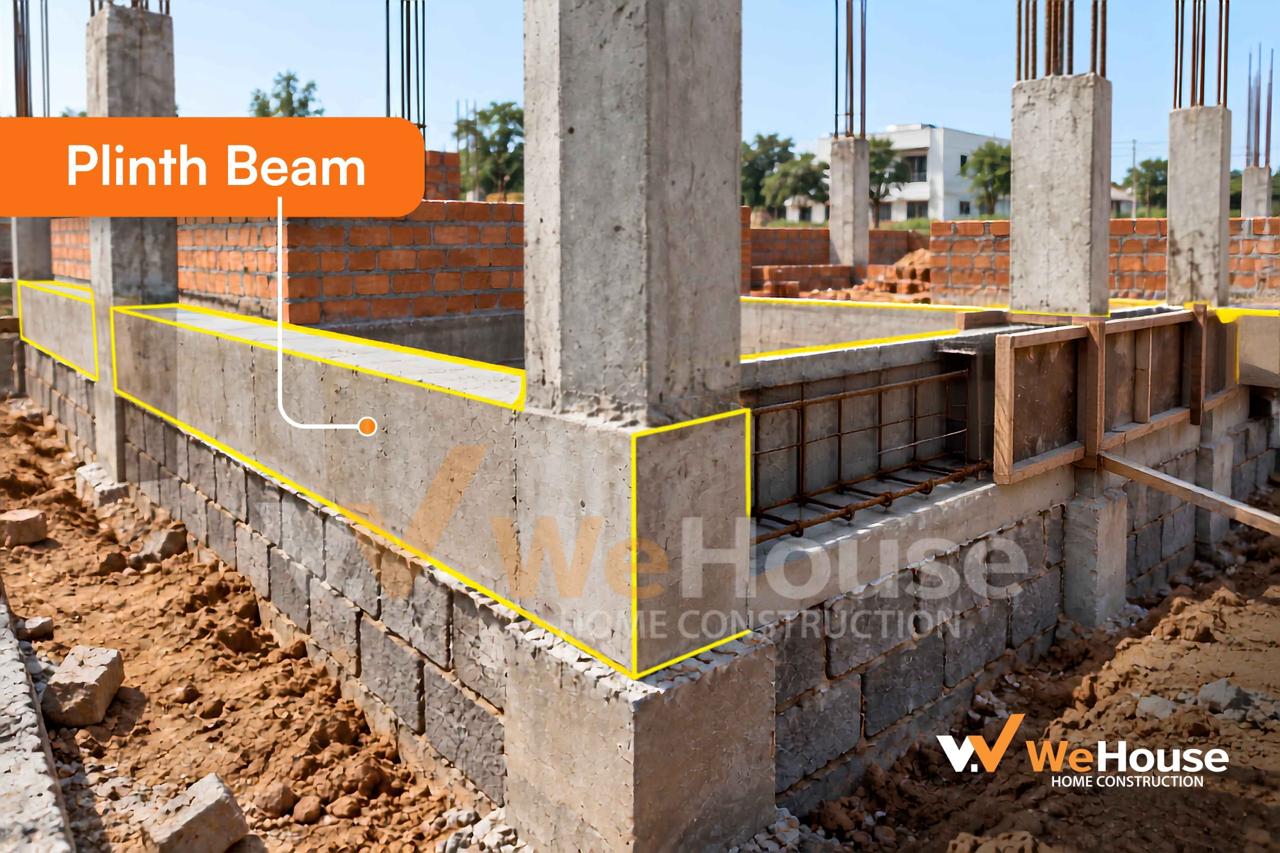
 What it actually does
Three jobs, all of them structural
1. It ties the building into one piece
Your columns sit on separate footings. Left alone, each footing settles a slightly different amount, because soil is never uniform even across a 200 sq yd plot. The plinth beam links every column at floor level so the frame settles together. This is also what stops columns from bending outwards at their base during an earthquake, which is why it is mandatory in seismic zones.
2. It spreads the wall load
A 9-inch brick wall on a G+1 house weighs roughly 1,000–1,200 kg per running metre. Without a beam, that load presses directly onto whatever is beneath it. The plinth beam collects the load along its length and delivers it to the columns and footings, which are designed to take it.
3. It blocks moisture from climbing
Soil moisture rises through brickwork by capillary action. A dense concrete plinth beam plus a damp-proof course on top of it interrupts that path. Rising damp is the reason ground-floor walls in older Hyderabad houses show patchy paint peeling about 2–3 feet above the floor.
What this looks like on a real site
200 sq yd plot · G+1 · Kollur, Hyderabad
On a 200 sq yd plot with a 40 × 45 ft footprint, the plinth beam runs along every external wall and under every internal load-bearing wall — roughly 240 running feet in total. It is cast in one continuous pour on the same day as the column starters, right after the foundation masonry reaches plinth level.
The sequence on site takes about four days: mark and level the top of foundation masonry, tie the reinforcement cage, fix shuttering on both faces, pour M20 concrete and vibrate it, then remove shuttering after 24 hours and cure with water for the next seven days. Backfilling and floor filling only start after that.
- Concrete used: about 3.4 cubic metres of M20
- Steel used: roughly 340 kg of TMT
- Cost at this site: ₹86,000, which was 1.9% of the ₹45 lakh build
What it costs you
Indicative Hyderabad rates · updated July 2026
| What you pay for | Per running foot | Notes |
|---|---|---|
| M20 concrete | ₹105 – 130 | Ready-mix costs more but pours better |
| TMT steel | ₹110 – 165 | Moves with steel rates; biggest variable |
| Shuttering | ₹35 – 55 | Both faces, one use |
| Labour & curing | ₹50 – 100 | Bar bending, pouring, vibrating, 7-day cure |
| Total | ₹300 – 450 | 230 × 230 mm section, G+1 |
Rates are indicative for Hyderabad as of July 2026 and assume a 230 × 230 mm section on a G+1 house. Always read your own quotation against the drawing, not against this table.
How to check it was done right
Six things you can verify yourself
- Cover blocks are present — Small concrete spacers should hold the steel about 25 mm away from every shuttering face.
- Stirrup spacing matches the drawing — If the drawing says 150 mm centres, you should not be finding 220 mm gaps.
- Laps are staggered and long enough — Overlap should be around 50 times the bar diameter.
- The pour is continuous — The beam should be cast in one go around the building.
- A vibrator was used — Honeycombing after deshuttering means poor compaction.
- Curing ran a full seven days — The surface should stay visibly wet.
Mistakes that cost money later
Casting the beam below finished ground level
If the top of the beam ends up below the outside ground, rainwater sits against it and moisture goes straight into the wall above. Keep the top of the beam at least 150 mm above the highest outside ground level.
Treating it as a place to save steel
Reducing 12 mm bars to 10 mm saves a few thousand rupees on a whole house. It also cuts the beam's capacity by about a third. Match the bar diameter and count to the structural drawing.
Backfilling immediately after deshuttering
Green concrete is nowhere near full strength. Wait out the full curing period before any filling or compaction touches the beam.
Leaving out the internal walls
Contractors sometimes run the beam only around the perimeter. Check the plan and make sure the beam runs under every load-bearing wall.
Ask your contractor before you pay for this stage
- Can I see the structural drawing showing the beam size and reinforcement?
- What grade of concrete are you using, and is it site-mixed or ready-mix?
- What is the top of the beam level relative to the road outside?
- Is the beam running under the internal walls too, or only the perimeter?
- Who inspects and signs off the reinforcement before the pour?
Common questions
Can I skip the plinth beam to save money?
No. On Indian soil conditions this is what stops uneven settlement from cracking your walls, and it is required in seismic zones. Skipping it saves under 2% of your build cost and risks structural repairs that cost many times more.
What size should it be for a G+1 house?
230 mm wide by 200–300 mm deep with 4 nos of 12 mm TMT bars and 8 mm stirrups at 150 mm centres is common. Your structural engineer fixes the final size based on span, soil and load.
Is a plinth beam the same as a tie beam?
A plinth beam is a tie beam that happens to sit at plinth level. Every plinth beam is a tie beam, but not every tie beam is a plinth beam.
Do I need one if my house is load-bearing, without columns?
Yes, and arguably more. In a load-bearing house the walls carry everything down to the foundation, so a continuous beam at plinth level is what keeps the whole wall settling as a unit.
How long after casting can I start the walls?
Shuttering comes off after about 24 hours, but curing runs a full seven days. Masonry above can usually start after two to three days; heavier loading waits until curing is complete.